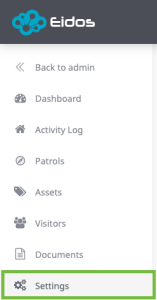
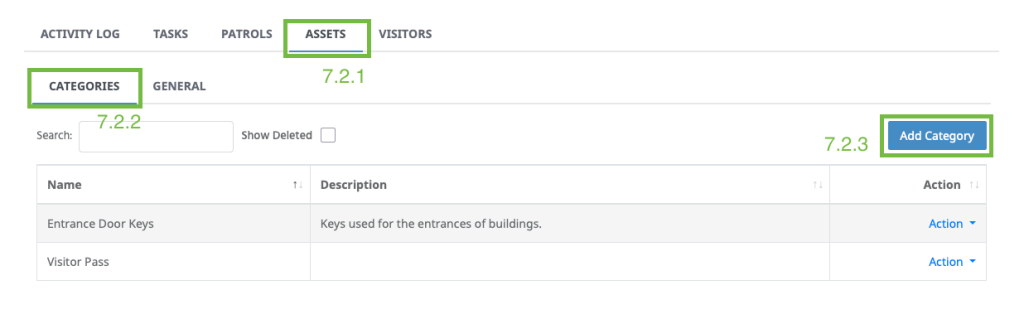
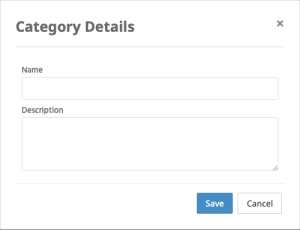
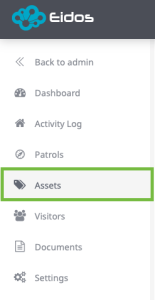
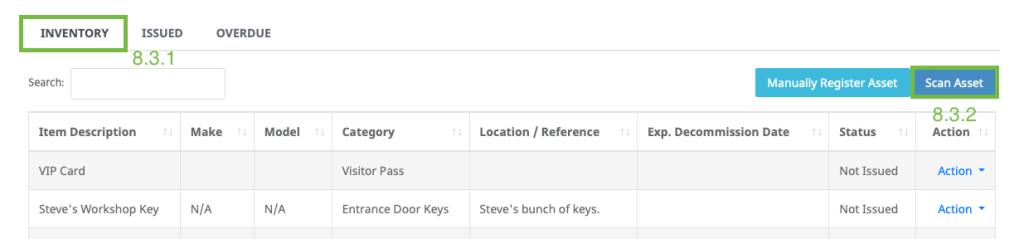
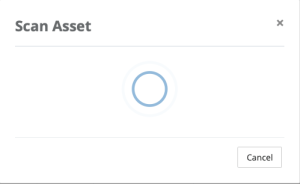
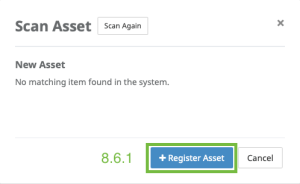
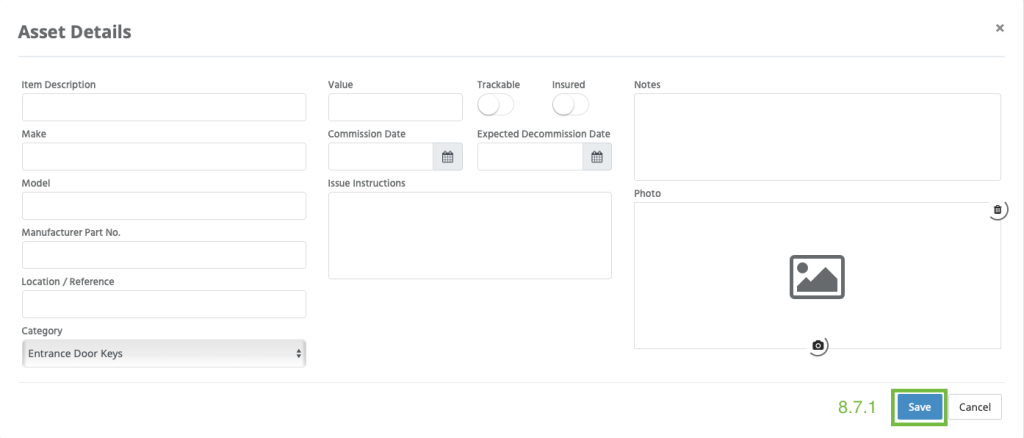
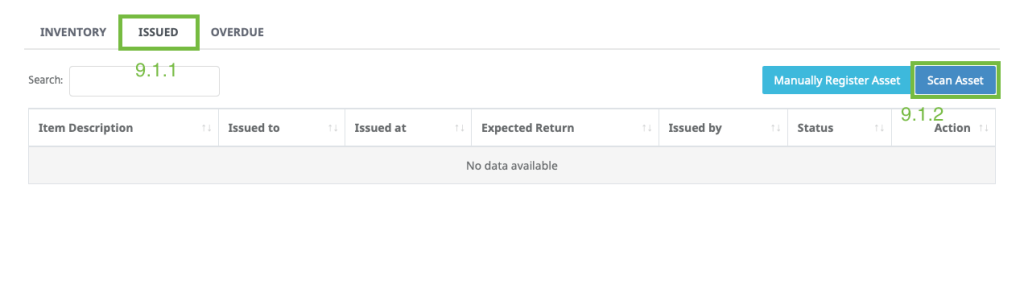
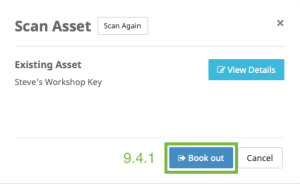
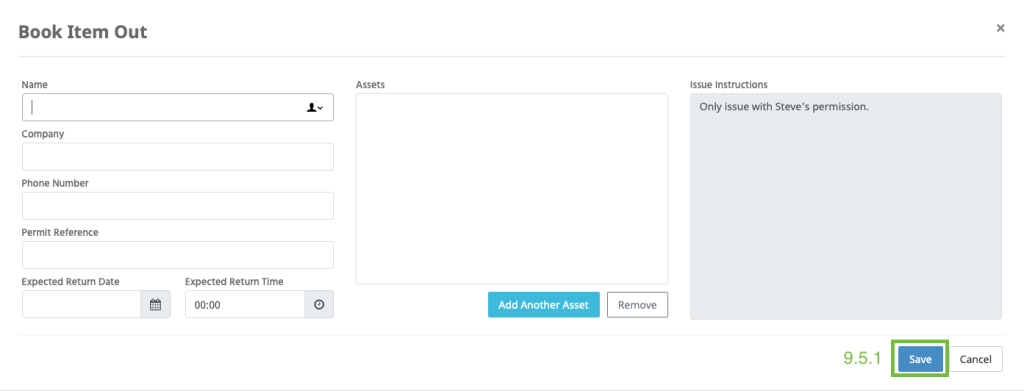
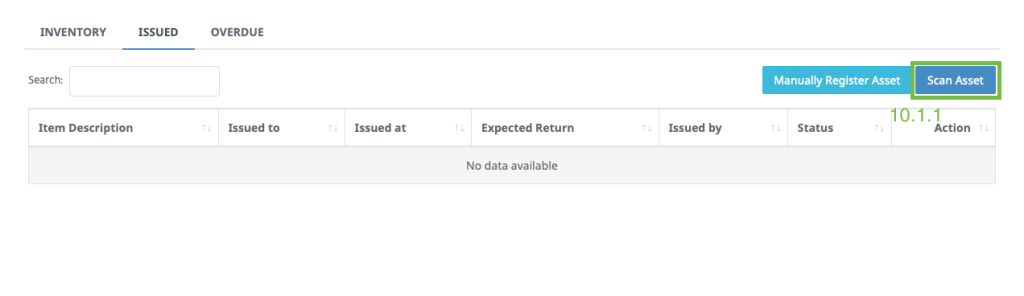
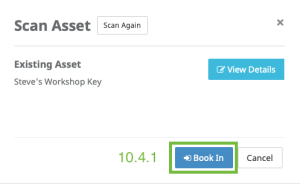
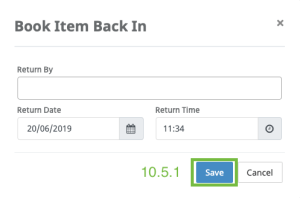
Key & Asset Management Support Settings IMPORTANT: ‘Client Administration’ rights are required for settings. Step 1 Fig 7.1 Before registering Assets, you will first need to create Categories in ‘Settings’ (see fig 7.1). Step 2 Fig 7.2 Select the ‘Assets’ tab (see fig 7.2.1), ‘Categories’ (see fig 7.2.2) and click ‘Add Category’ (see fig 7.2.3). Step 3 Fig 7.3 Enter the Category Name and a Description and click ‘Save’. Registering Assets Step 1 Fig 8.1 Before registering an Asset, you will need to connect the EIDOS NFC Reader to the USB port of your PC (see fig 8.1). Step 2 Fig 8.2 To register an Asset, go to ‘Assets’ (see fig 8.2). Step 3 Fig 8.3 Select the ‘Inventory’ tab (see fig 8.3.1) and click ‘Scan Asset’ (see fig 8.3.2). Step 4 Fig 8.4 Fig 8.5 The ‘Scan Asset’ pop up will appear (see fig 8.4), now scan the Asset using the NFC Reader (see fig 8.5). Step 5 Fig 8.6 The ‘New Asset’ pop up will appear (see fig 8.6), now click ‘+Register Asset’ (see fig 8.6.1). Step 6 Fig 8.7 The ‘Asset Details’ window will appear (see fig 8.7), now complete fields and click ‘Save’ (see fig 8.7.1) to register the asset. Issuing Assets Step 1 Fig 9.1 Select the ‘Issued’ tab (see fig 9.1.1) and click ‘Scan Asset’ (see fig 9.1.2). Step 2 Fig 9.2 Fig 9.3 The ‘Scan Asset’ pop up will appear (see fig 9.2), now scan the Asset using the NFC Reader (see fig 9.3). Step 3 Fig 9.4 The ‘Existing Asset’ pop up will appear (see fig 9.4), now click ‘Book Out’ (see fig 9.4.1). Step 4 Fig 9.5 The ‘Book Item Out’ window will appear (see fig 9.5), now complete fields and click ‘Save’ (see fig 9.5.1) to book out the asset. Returning an Asset Step 1 Fig 10.1 Click ‘Scan Asset’ (see fig 10.1.1). Step 2 Fig 10.2 Fig 10.3 The ‘Scan Asset’ pop up will appear (see fig 10.2), now scan the Asset using the NFC Reader (see fig 10.3). Step 3 Fig 10.4 The ‘Existing Asset’ pop up will appear (see fig 10.4), now click ‘Book In’ (see fig 10.4.1). Step 4 Fig 10.5 The ‘Book Item Back In’ window will appear (see fig 10.5), now complete fields and click ‘Save’ (see fig 10.5.1) to book the Asset back in.