IMPORTANT: ‘Client Administration’ rights are required for settings.
Step 1
Fig 2.1
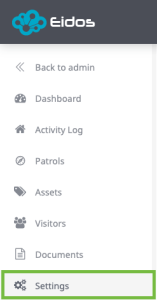
To create or edit an Activity Log Subject Heading, you will need to be in ‘Settings’ (see fig 2.1).
Step 2
Fig 2.2
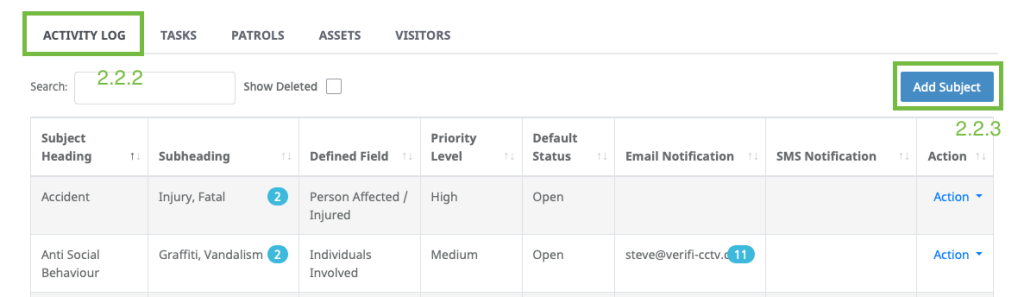
Select the ‘Activity Log’ tab (see 2.2.2) and click ‘Add Subject’ (see 2.2.3).
Step 3
Fig 2.3
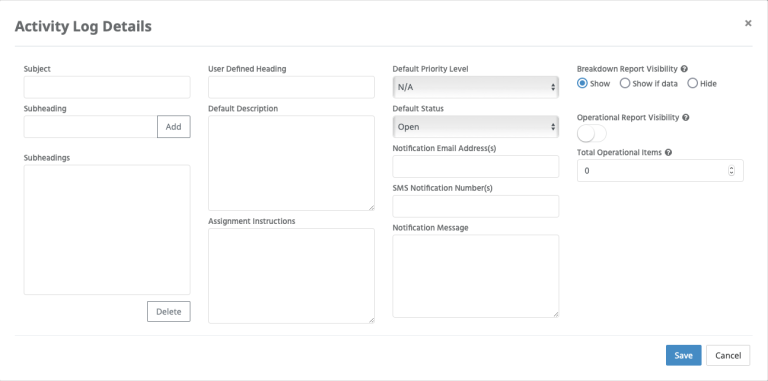
Complete Activity Log details (see fig 2.3).
Subject: This is the main heading, e.g. Fault
Subheading: Multiple subheadings can be created, e.g. Electrical, Plumbing, Gas
User Defined Heading: This is for a field relevant to the subject heading, e.g. Fault Reported by:
Default Description: Prompt the user to enter the text you would prefer to see, e.g. A (electrical fault/leak/gas leak) has been reported in the (enter area here).
Assignment Instructions: Enter instructions on what to do in the event of the Subject, e.g. In the event of a has leak contact…
Default Priority Level: This can be N/A, Low, Medium or High.
Default Status: This can be set to Open or Closed.
Notification Email Address(s): Automatically notify someone via email with a PDF attachment when a Subject/Event takes place. Multiple email addresses can be used by separating them with the semicolon (;) symbol.
SMS Notification Number(s) – Optional: This is a chargeable service that automatically notifies you via SMS when a Subject/Event takes place.
Notification Message: Include a message that will be displayed in the Email and SMS notifications.
Breakdown Report Visibility & Operational Report Visibility: See Dashboard.
Task Reminders
IMPORTANT: ‘Client Administration’ rights are required for settings.
Step 1
Fig 3.1
To create or edit a Task Reminder, you will need to be in ‘Settings’ (see fig 3.1)
Step 2
Fig 3.1
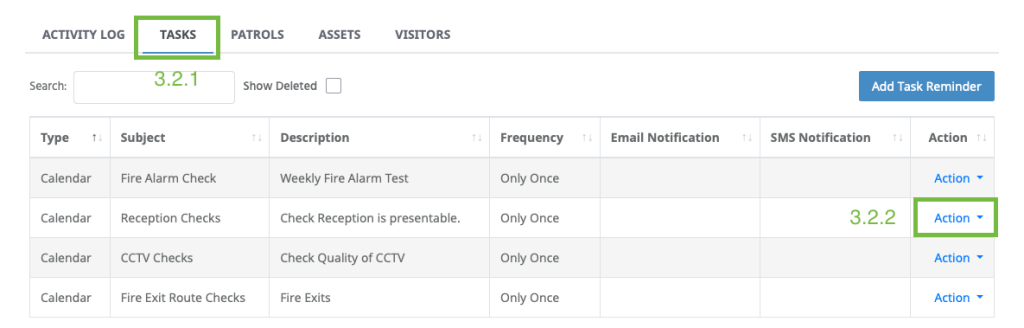
Select the ‘TASK’ tab (see 3.2.1) and click ‘Add Task Reminder’ (see (3.2.2).
Step 3
Fig 3.1
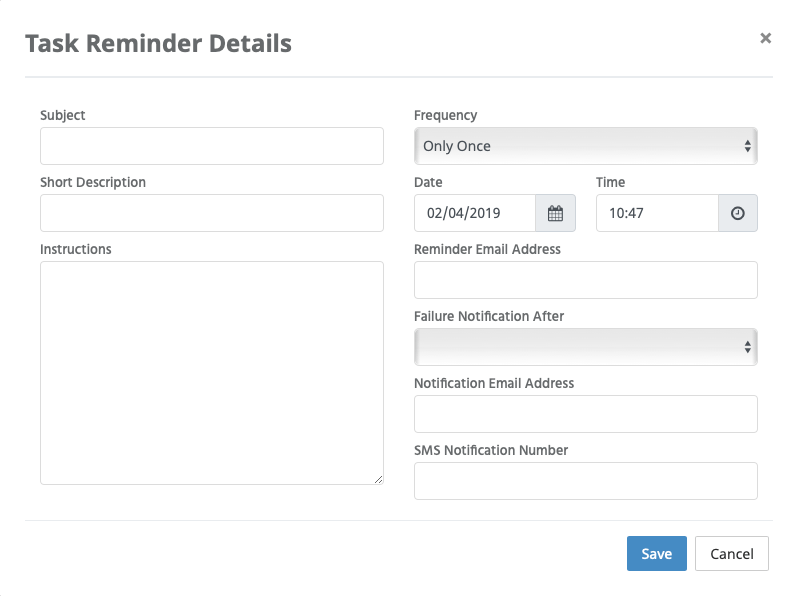
Complete Task Reminder details (see fig 3.3).
Subject: This is the main heading, e.g. Fire Alarm Check
Short Description: A short description of the task to be carried out, e.g. Weekly Fire Alarm Check
Instructions: Detailed instructions of the task, e.g. Ensure the Fire Warden for each tenant is notified that a Fire Alarm check is to be carried out
Frequency: This can be Only Once, Daily, Weekly, Fortnightly, Monthly or Yearly.
Date: Date the first reminder is to be displayed.
Time: Time the reminder is set to be displayed.
Reminder Email Address: The system can automatically send a reminder to notify a user that a task is due via email.
Failure Notification: The system can automatically send out an alert after a specified time if a task has not been completed. This can be 15, 30, 45 minutes, 1 or 2 hours to a ‘Notification Email Address‘.
SMS Notification Number – OPTIONAL: This is a chargeable service that automatically notifies you via SMS when a task has not been completed.
Creating an Entry
Step 1
Fig 4.1
To create or edit an Entry you will need to be in the ‘Activity Log’ (see fig 4.1).
Step 2
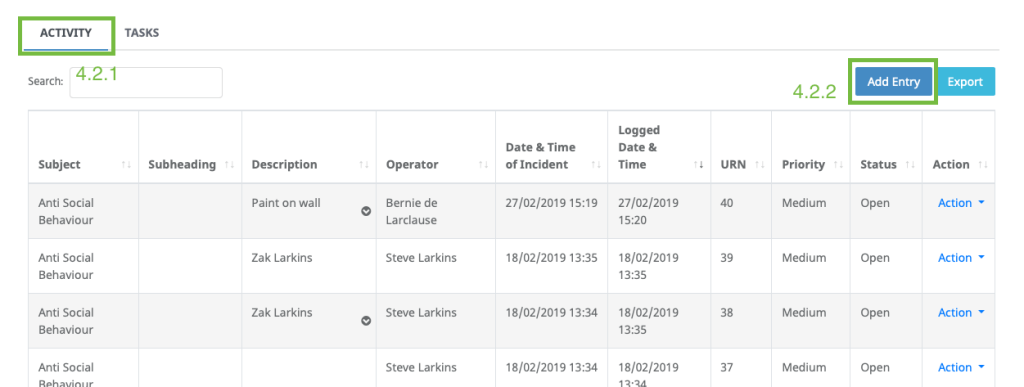
Fig 4.2
See the ‘ACTIVITY’ tab (see 4.2.1) and click ‘Add Entry’ (see 4.2.2).
Step 3
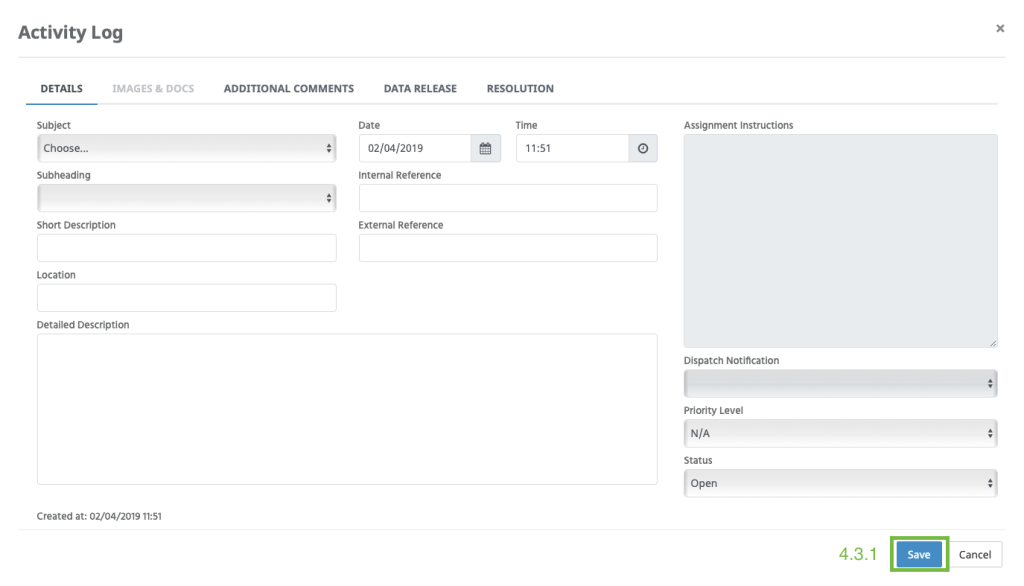
Fig 4.3
Complete the fields and click ‘Save’ (see 4.3.1).
Step 4
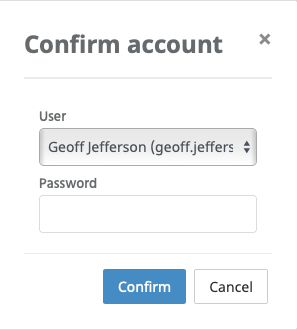
Fig 4.4
If PWA (Password Authentication) has been set up, you will need to select your user name from the drop down menu and enter your password (see fig 4.4).
Adding to an Entry
Step 1
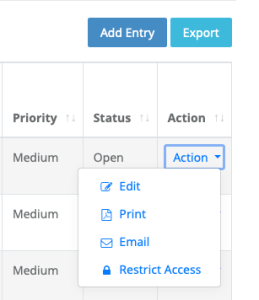
Fig 4.5
To add additional comments, images or documents to an entry, click on ‘Action’ & ‘Edit’ (see fig 4.5).
Step 2
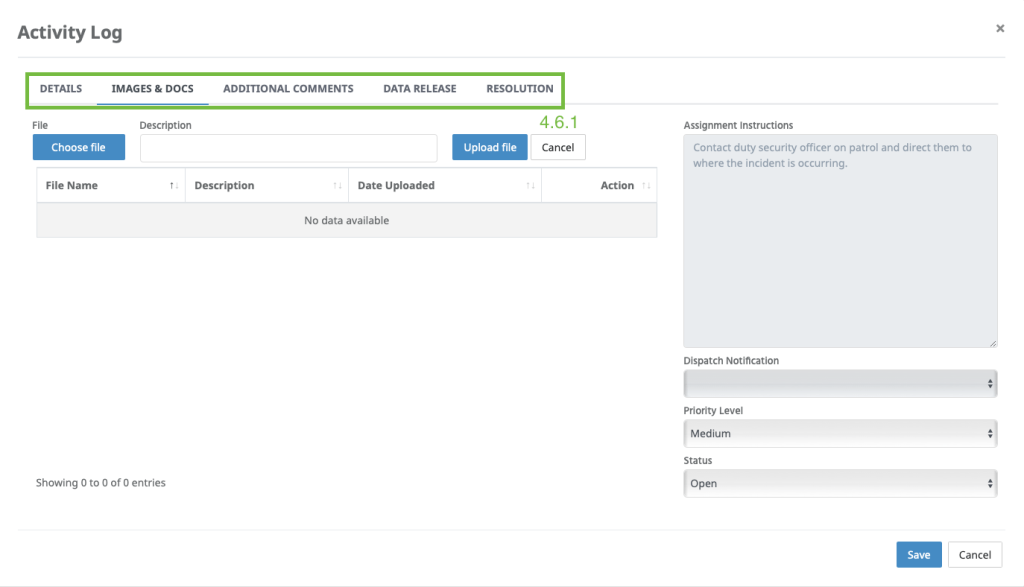
Fig 4.6
Select the tabs across the top to access the different sections (see 4.6.1).
Completing a Task
Step 1
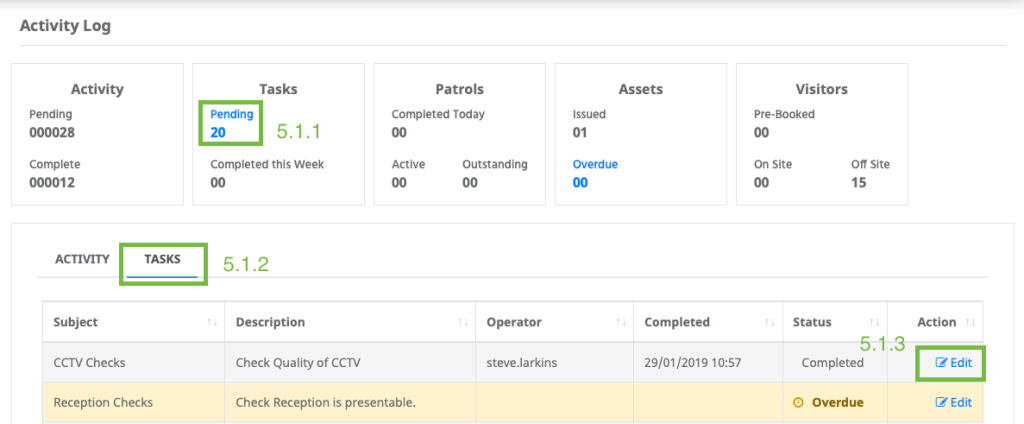
Fig 5.1
To access Tasks, click on ‘Pending’ (see 5.1.1) or the ‘Task’ tab (see 5.1.2) and ‘Edit’ (see 5.1.3).
Step 2
Fig 5.1
To complete a Task, select ‘Completed’ from the ‘Status’ drop down menu (see 5.2.1) then ‘Save’ (see 5.2.2).